Image Compression Tool & Guide for Modern Web Design
Instantly compress images for web, email, and apps—without losing visible quality. Our user-friendly tool supports PNG, JPG, and WebP, helping you optimize images for faster website performance, better SEO, and a smoother user experience. Explore best practices, lossless vs lossy compression, and answers to all your image optimization questions.
- Compress PNG, JPG/JPEG, and WebP images online
- Customize quality and compare before/after in real time
- Step-by-step guidance and expert tips for web designers

Try Our Online Image Compression Tool
Compress PNG, JPG, or WebP images for free. All processing is client-side for privacy—no uploads to our server.
Why Compress Images for the Web?
- Faster load times: Small images speed up your site and keep visitors engaged.
- Boost SEO: Google ranks faster-loading sites higher. Large images slow you down.
- Lower bounce rates: Users abandon slow pages—compressed images help keep them around.
- Save bandwidth: Smaller files mean less data usage for you and your visitors (especially on mobile).
- Better UX: Fast images create a smoother, more professional experience.
Tip: Even placeholder images should be compressed for demo sites and UI previews.
Lossless vs. Lossy Image Compression Explained
- Lossless: Reduces file size without losing any data. Use when you need pixel-perfect quality (e.g., logos, icons).
- Lossy: Removes some data for much smaller files, but may reduce quality. Ideal for photos, backgrounds, and web graphics.

Lossless: Crisp
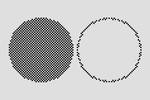
Lossy: Smaller file
Best Practice: For web photos, use lossy (JPG/WebP, 70-85% quality). For sharp graphics, try lossless PNG.
Pros & Cons
| Type | Pros | Cons |
|---|---|---|
| Lossless | Perfect quality, reversible | Larger file size |
| Lossy | Much smaller file size, fastest loads | Some detail lost (may not be visible) |
Step-by-Step Guide: Compress Images Without Losing Visible Quality
- Click "Choose Image" and select a PNG, JPG, JPEG, or WebP file from your device (max 8MB).
- Pick compression type: Lossy for photos, Lossless for graphics.
- Adjust quality slider for best balance (lower = smaller file; higher = better quality).
- Select output format (JPG, PNG, or WebP).
- Click "Compress Image"—see the before/after preview and download your optimized image!
Tip: Use our API Reference for bulk or automated workflow integration.

Best Practices: Optimize Images for Web Design
- Keep file sizes under 200 KB for most web images—banners and hero images can be up to 400 KB if needed.
- Use JPG for photos (80% quality), PNG for logos/icons, WebP for best balance if browser support is needed.
- Always preview images after compression; check for visible artifacts or blurring.
- Retain alt text and descriptions for accessibility—compression does not affect these.
- Resize images to display size before compressing (don’t serve 2000px images in 300px slots).
- Use Features-Formats to compare format strengths.
Do: Compress every image before uploading. Don’t: Use uncompressed camera photos on your website!
Recommended File Sizes
| Use Case | Recommended Size | Format |
|---|---|---|
| Hero Banner | < 400 KB | JPG/WebP |
| Product Photo | 100–200 KB | JPG/WebP |
| Logo/Icon | 20–60 KB | PNG/WebP |
| Thumbnail | 10–40 KB | JPG/PNG/WebP |
Image Compression FAQ: Best Practices & Web Optimization
Use lossy compression (JPG/WebP, 70-85% quality) for photos and preview results before saving. Lossless compression (PNG) preserves every pixel but results in larger files. Adjust quality sliders and visually compare before downloading to fine-tune the trade-off.
Aim for under 200 KB for most web images. Hero banners can be up to 400 KB, but smaller is always better. Logos and icons should be under 60 KB, and thumbnails below 40 KB. Always compress and resize before uploading.
Yes—compressed images load faster, improving Core Web Vitals and boosting SEO. Google rewards sites with fast load times and low image bloat. Always add meaningful alt text for further SEO and accessibility benefits.
All modern browsers (Chrome, Edge, Firefox, Safari, Opera, mobile) support WebP. For maximum compatibility, provide JPG or PNG fallback for older browsers and emails. Use
srcset to serve the best format automatically.
Yes—our tool processes images entirely in your browser. No files are uploaded or stored on our server, so your images remain private and secure on your device.
Explore More: Related Tools & Resources
Image Format Comparison
Compare PNG, JPG, GIF, and WebP for web optimization.
API Reference
Automate image compression and delivery via our API.
Image Accessibility Guide
Ensure images remain accessible after compression.
All Features
See every tool and feature for designers & developers.
Want more tips? See our General FAQ for web image optimization strategies.
Optimize your images for web design—faster sites, better UX, and higher SEO await!